How to Change Nocks on Crossbow Bolts
Quick answer: you can change nocks on many crossbow bolts, but only use nocks that are compatible with the bolt and the crossbow. Some crossbows require a specific nock style. A wrong nock can affect string contact, accuracy, and safety. If you are unsure, check the crossbow manual or ask a bow shop.
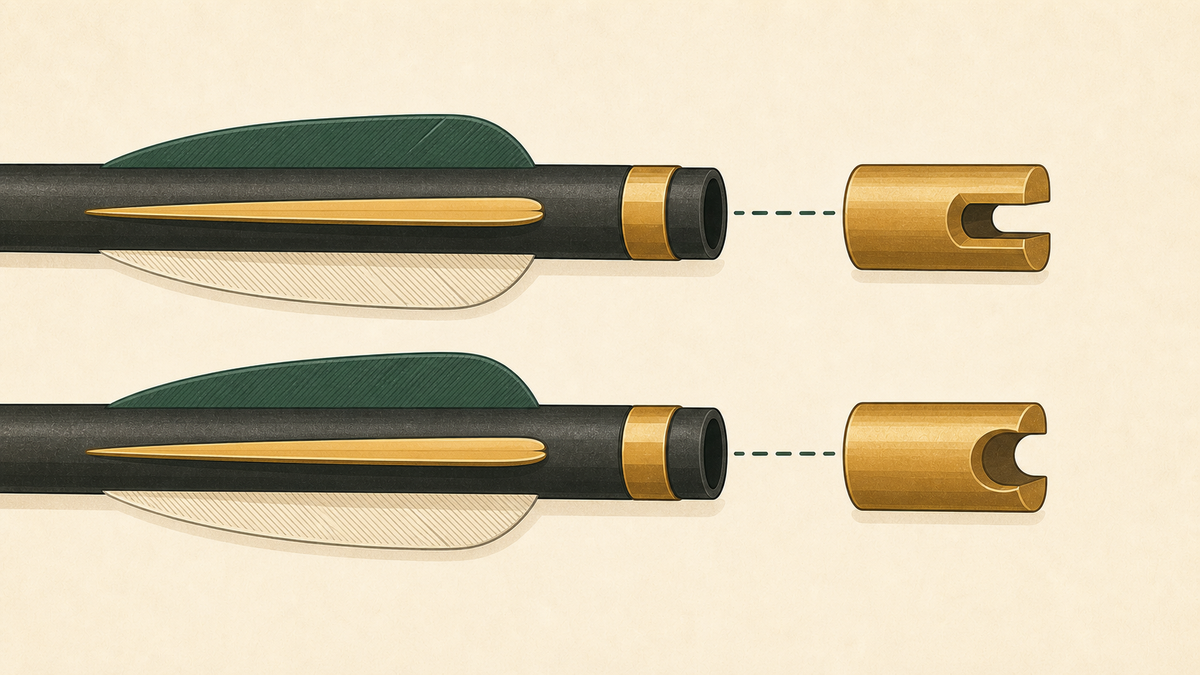
Why crossbow nock fit matters
The nock controls how the string sits on the bolt. If the fit is wrong, you can get poor string contact, weak accuracy, or bolt damage. Lighted nocks and standard nocks can also install differently, so the part style matters as much as the size.
Common nock types
- Flat nocks
- Moon or half-moon nocks
- Capture nocks
- Lighted nocks
- Manufacturer-specific nocks
Do not assume all nocks are universal. The crossbow maker’s instructions come first.
What you need
- The correct replacement nocks
- A clean work area
- A soft cloth
- A nock tool or pliers only if they are appropriate for the part
- The manufacturer’s instructions
- An optional arrow square or alignment reference
Step-by-step: changing a crossbow bolt nock
- Confirm the crossbow is uncocked and unloaded.
- Inspect the bolt shaft for cracks or damage.
- Remove the old nock carefully without crushing the shaft.
- Clean the nock seat if needed.
- Install the correct replacement nock.
- Align it according to manufacturer guidance.
- Check fit and seating.
- Test only at a safe range with a proper target and backstop.
When not to reuse a bolt
Do not reuse a bolt if the carbon is cracked, the shaft is split, the insert is loose, the nock seat is damaged, the bolt took unknown impact damage, or the nock will not seat securely.
Lighted nock notes
Lighted nocks may use batteries or switches. Follow the maker’s instructions and do not force them into an incompatible shaft. If the fit feels wrong, stop and recheck the part number.
Safety check before shooting
- Bolt is fully seated.
- Nock type matches the crossbow manual.
- Bolt length and weight are correct for the crossbow.
- No cracks or shaft damage are visible.
- The target and backstop are safe and clear.
- You are following the manufacturer’s loading instructions.
Related crossbow guides
- Crossbows
- How Long Can You Leave a Crossbow Cocked?
- How Far Will a Crossbow Shoot?
- Arrows
- Archery Tools
References
- TenPoint: What nock should I use with my crossbow?
- TenPoint Alpha-Nock product page
- Barnett: Safety
- Ravin R5X/R10X Instruction Manual
Frequently asked questions
Are crossbow nocks universal?
No. Crossbow nocks are not universal, and the manual or maker’s compatibility chart should guide the replacement.
Can I use moon nocks instead of flat nocks?
Only if the crossbow maker says that style is compatible.
How do I know what nock my crossbow needs?
Check the crossbow manual or the maker’s bolt compatibility page.
Can I replace lighted nocks?
Yes, if the shaft and lighted nock are designed to work together.
Should I shoot a bolt with a damaged nock?
No. Replace the nock or retire the bolt if the fit or seat is damaged.
Do crossbow bolts need to be indexed?
Follow the maker’s guidance. Some systems require specific alignment or nock orientation.
Can the wrong nock damage a crossbow?
It can. Wrong fit can affect string contact and may damage the bolt or the crossbow.